NEFT Bank transfer
1. External Service Configuration for RBL
Note: Initially the value should be added manually in the database.
The First step is configuring the external service. This is one time configuration where all the data will be provided by the RBL for transaction. Currently only disbursement are supported not repayments.
Navigate to Admin>>System>>External Service
# | Field Name | Description |
|---|---|---|
| 1. | client_id | This is a unique id provided for the client of RBL. |
| 2. | client_secret | This is a unique secret code provided for the client of RBL. |
| 3. | user | This is the user name provided by the user to the RBL |
| 4. | password | This is the password provided to the user by RBL |
| 5. | keystore_path | This the path for SSL for encrypting the RBL data. |
| 6. | keystore_password | This is the password for Keystore. |
| 7. | rbl_end_point | This is the API for hitting the RBL server for cashless transaction. |
| 8. | do_single_txn_resource | This is the API for doing single transaction. |
| 9. | get_single_txn_status_resource | This is the API to get the status of single transaction. |
| 10. | rpt_code | This is the rpt code provided by the RBL. |
| 11. | corporate_id | This is corporate id provided by the RBL. |
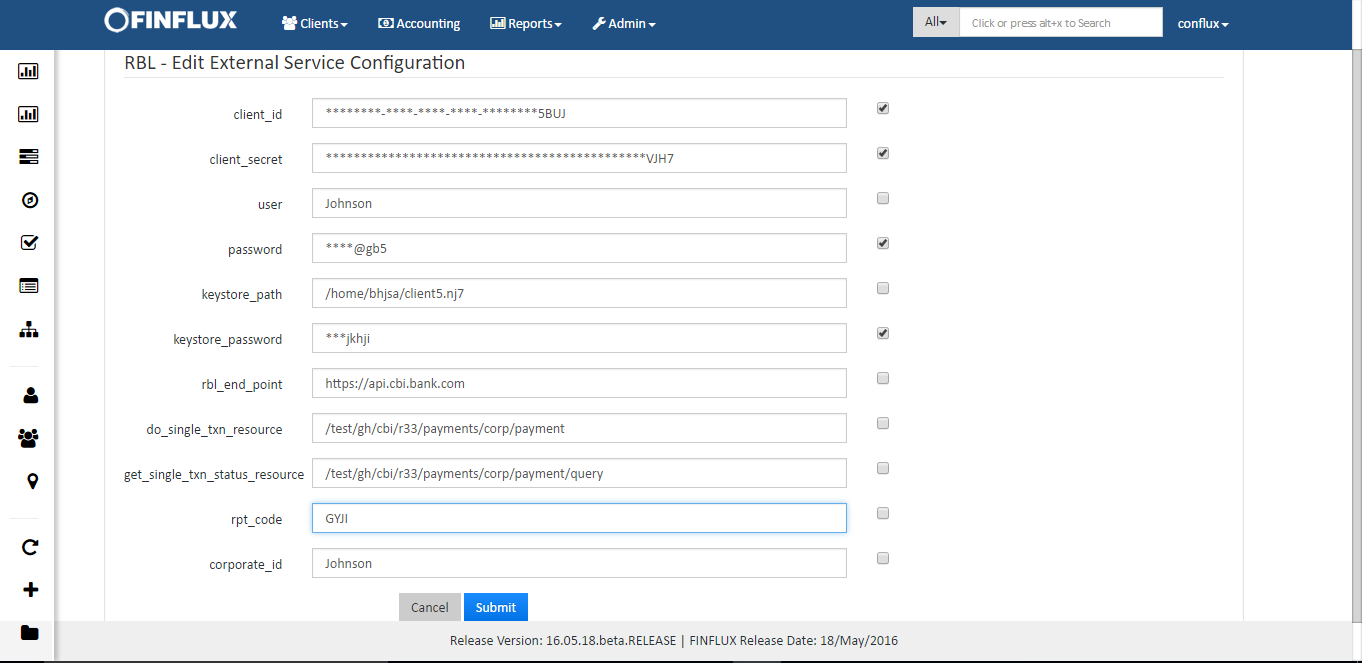
fig 1: RBL External Service configuration
2. Payment Type Definition for RBL
Payment type definition for RBL should be done in Organization>>Payment Type>>Create Payment Type. This is the account from where the Loan amount should be debited.
| # | Field Name | Field Description |
|---|---|---|
| 1. | Payment Type | Provide a name for payment type. |
| 2. | Description | Provide a description for the payment type. |
| 3. | Is cash payment? | This is a checkbox for cash payment. Since RBL NEFT is not a cash payment, this checkbox shouldn't be checked. |
| 4. | Position | Provide the position for the payment type. |
| 5. | External service | Select the external service as RBL for RBL transaction. |
| 6. | Bank Account Holder Name | Provide the Account Holder Name. In the example Johnson is the Bank Account Holder, hence his name has been provided. |
| 7. | Bank Account Number | Should provide the Bank Account Number. This is the Account Number from where the payment should happen. |
| 8. | Account Type | Provide the Account Type. |
| 9. | Bank IFSC code | Provide the valid IFSC code. |
| 10. | Bank Name | Provide the Bank Name. |
| 11. | Bank City | Provide the Bank City. |
| 12. | Mobile Number | Provide the mobile number. |
| 13. | Provide the email id of the account holder. |
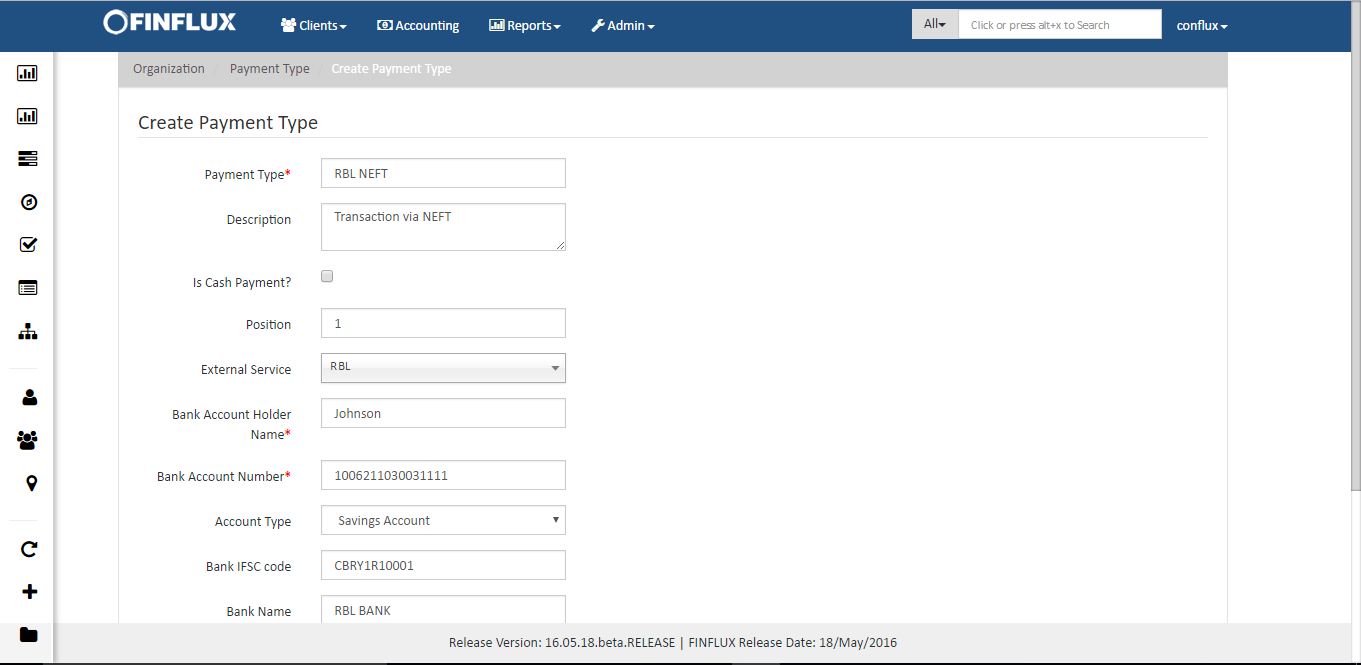
fig 2.1: Create Payment Type
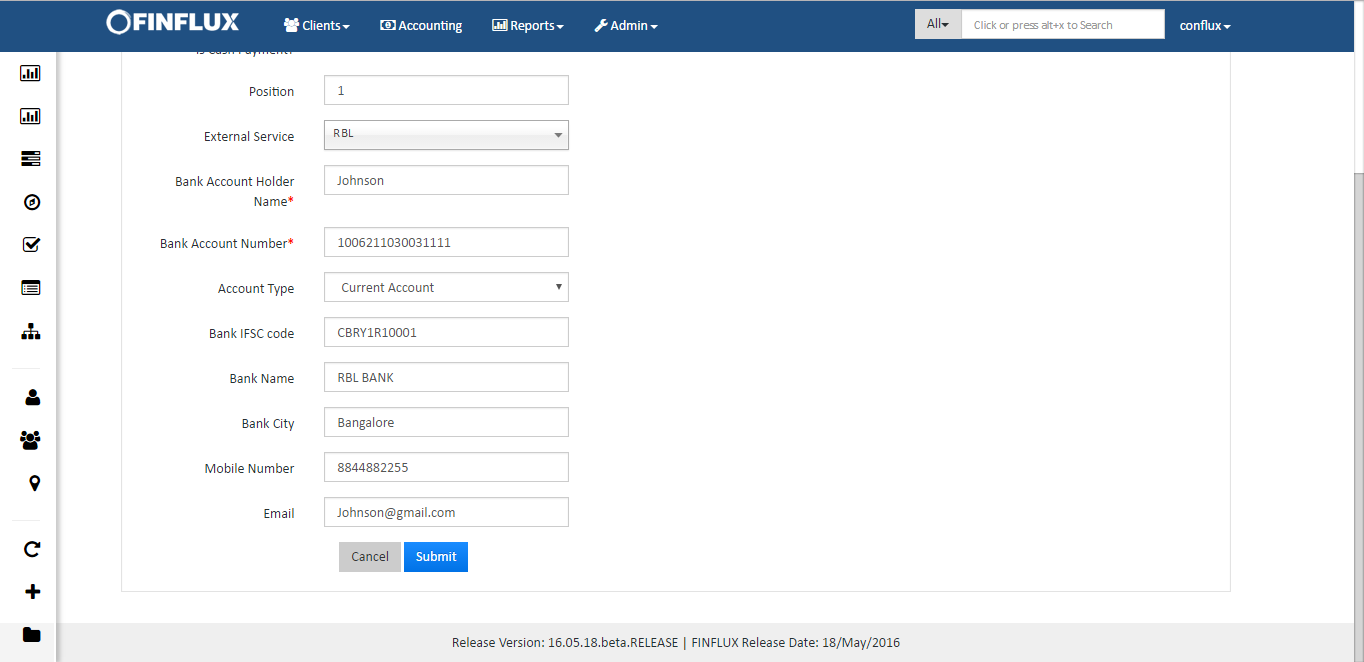
fig 2.2: Create Payment Type
3. Update Bank Account Details of Client
To receive the disbursed loan amount the client should have a bank account. Clients bank account details should be provided in clients>>Client's details>>More>>Bank account details.
| # | Field Name | Field Description |
|---|---|---|
| 1. | Bank Account Holder Name | Provide Bank Account Holder Name. |
| 2. | Bank Account Number | Provide Bank Account Number. |
| 3. | Account Type | Provide Account type for the Account. |
| 4. | Bank IFSC Code | Provide valid IFSC Code. |
| 5. | Bank Name | Provide Bank Name. |
| 6. | Bank City | Provide Bank City. |
| 7. | Mobile Number | Provide Mobile Number of the Bank Account Holder. |
| 8. | Provide Email of the Bank Account Holder. |
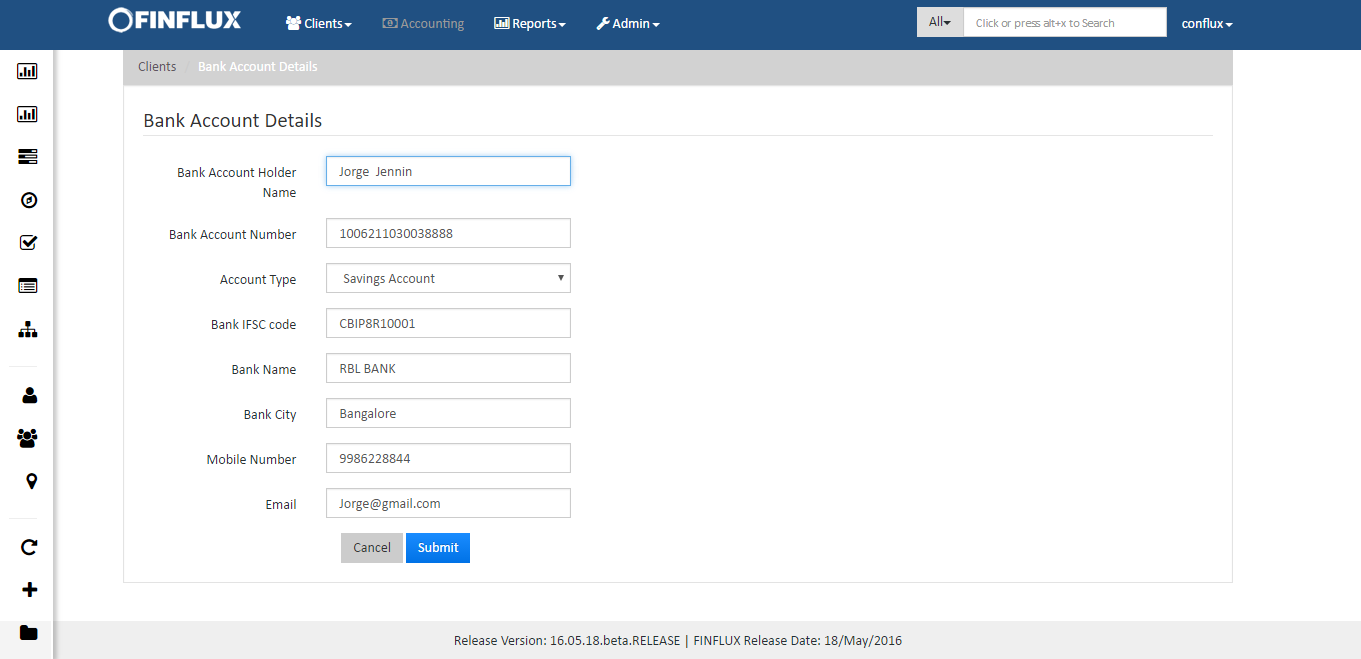
fig 3: Bank Account Details
4. Usage of NEFT in disbursing Loan
This NEFT feature is supported for only New Loan Application.
Step 1: Apply for the New Loan Application and Approve the Loan
Step 2: During Disbursement the LO/User come across the below screen where the payment type should be selected as "RBL NEFT" which was defined/added in payment type and click on disburse.
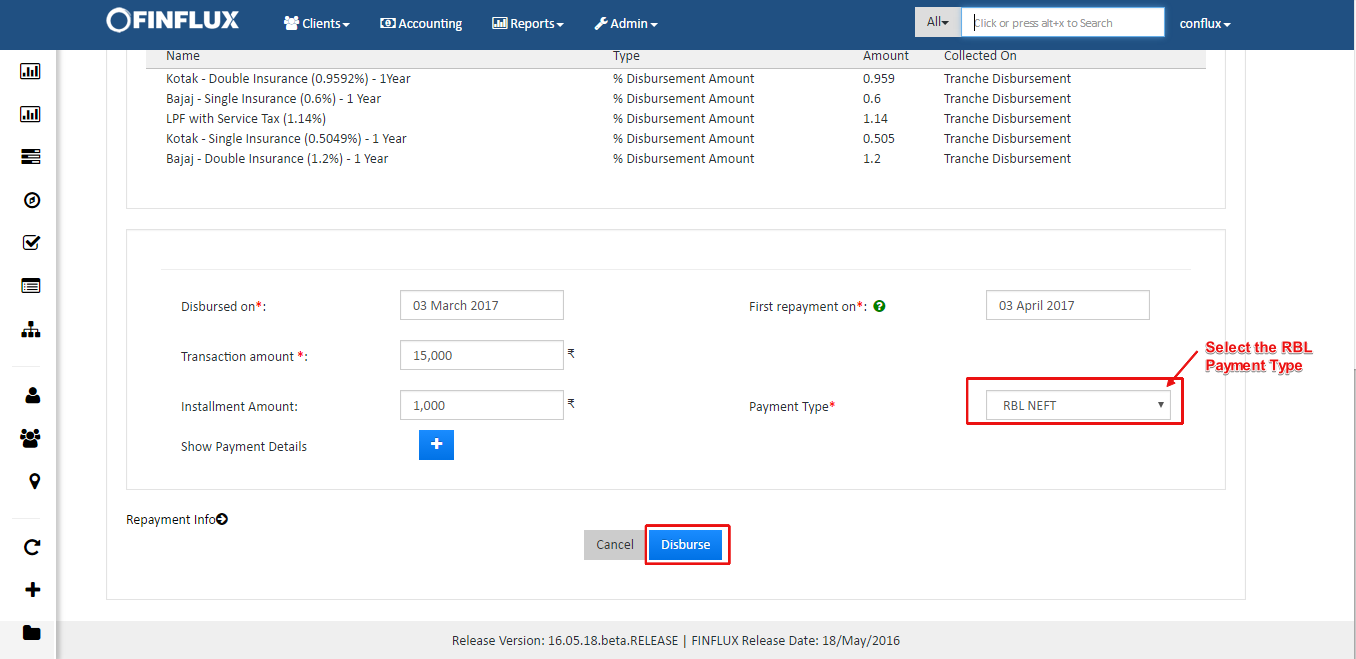
fig 4: New Loan Application (Disbursement)
Step 3: This will navigate to the Loan Page where the LO/User should click on "Bank Transfer". The bank transaction is not yet initiated but will be drafted as shown in the figure. The LO should click on this drafted data.
![]()
fig 5.1: Bank Tranfer
Step 4: This will navigate to the below screen where the LO should select the mode of transfer, click on submit and Activity complete. Once the LO does this, the task will be assigned to the Branch Manager as shown in the fig
![]()
fig 5.2: Bank Tranfer
![]()
fig 5.3: Bank Tranfer
Task List: Once the NEFT tranfer is submitted for approval from the Branch Manager, the task will get listed under My Other Tasks for the permitted user (Branch Manager) where the Branch Manager should navigate to the approval page for NEFT Transfer and should be approve or reject the proposal for NEFT transfer.
Precondition for initiating bank transactions: Should run the scheduler job (initiate bank transactions).
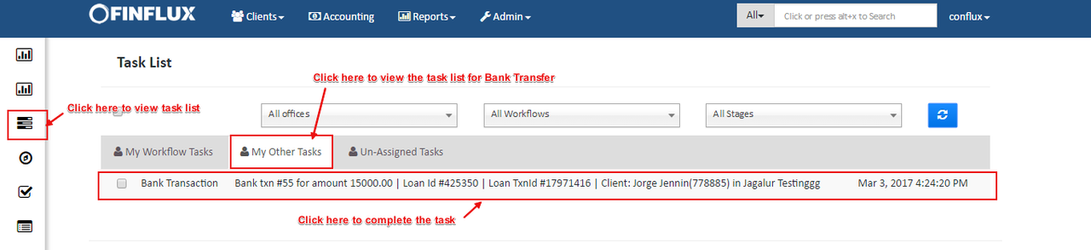
fig 6: Task List
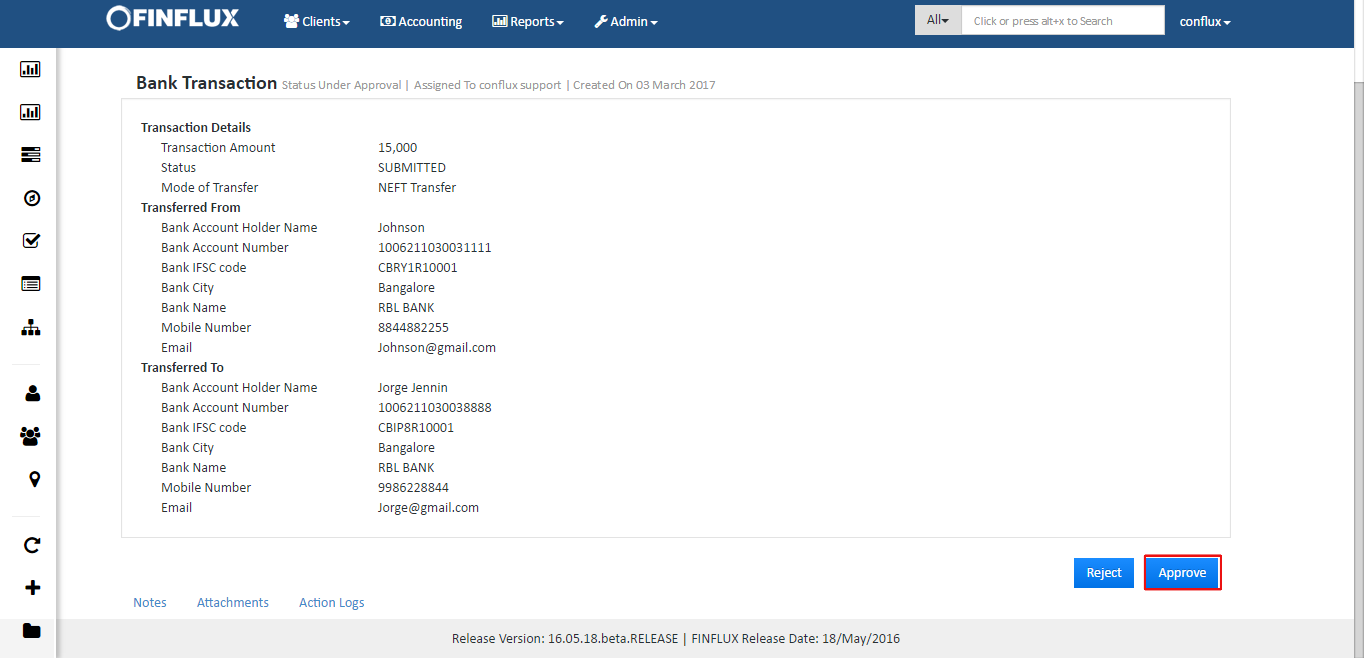
fig 7: Bank Transaction Approval
Approved Transaction by the Branch Manager will initiate the NEFT transaction and hence the status changes to initiated. In fact the request will be sent to hit the RBL api. Once the RBL gives the response the status changes to Completed.
Precondition for updating the status: Should run the scheduler job (update bank transaction status) after 30 min of running scheduler job (initiate bank transaction).
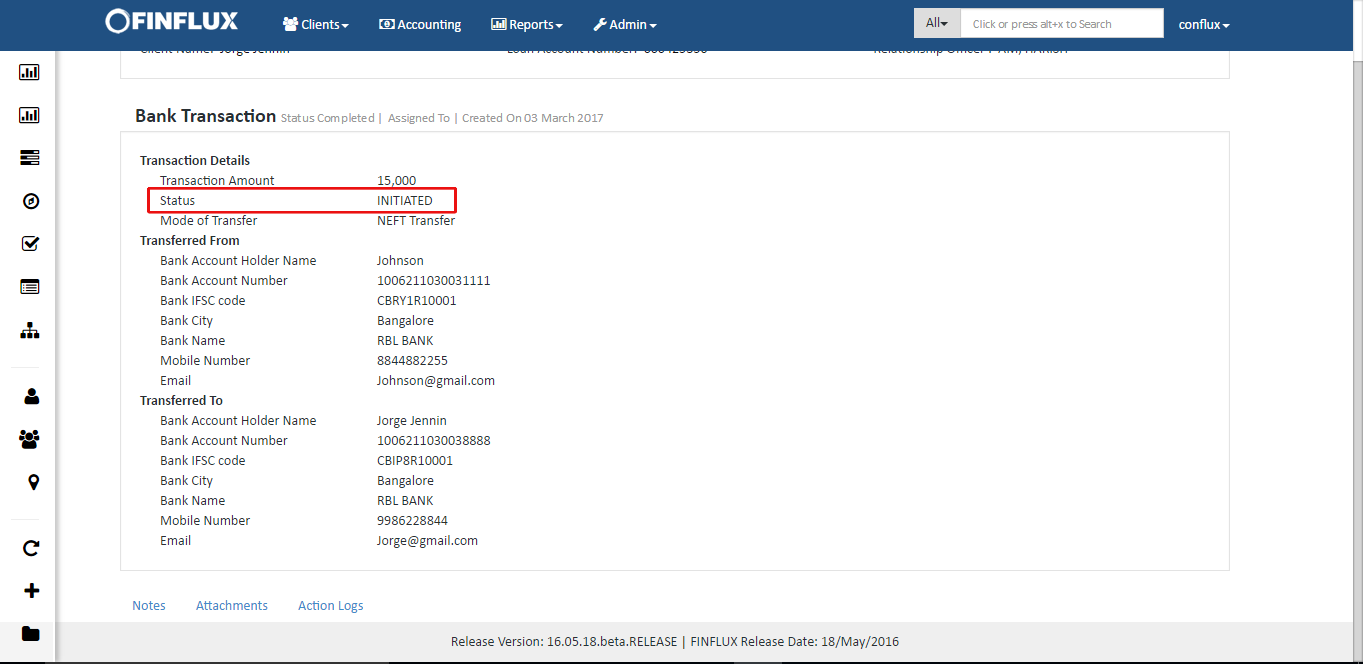
fig 8: Bank Transaction Initiated