Loan Products
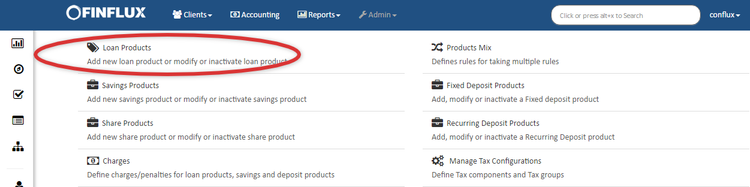
Beginning at the main screen, select Admin, then Products from the drop-down menu. This will launch the Products menu.
Select Loan Products.
Create Loan Product
Details
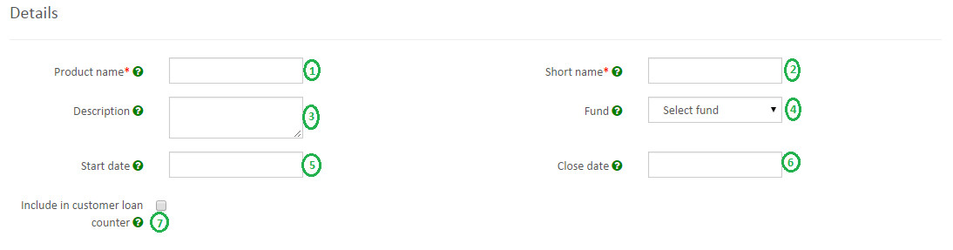
- 1 - Provide Loan Product name .(Mandatory)
- 2 - Provide Short name. (Mandatory)
Currency
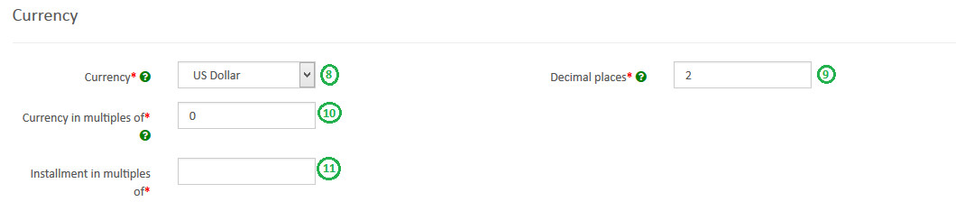
- 8 - Select Currency(Mandatory). Need to have defined required currency: Currency Configuration
- 9 - Provide Decimal places(Mandatory).
- 10 - Provide Currency in multiples of(Mandatory). This is to provide total amount rounding off. For ex: 10, so Total amount gets rounded of to 10's.
- 11 - Provide Installment in multiples of(Mandatory). This is to provide installment rounding off. For ex: 10, so Installment amount gets rounded of to 10's.
Terms
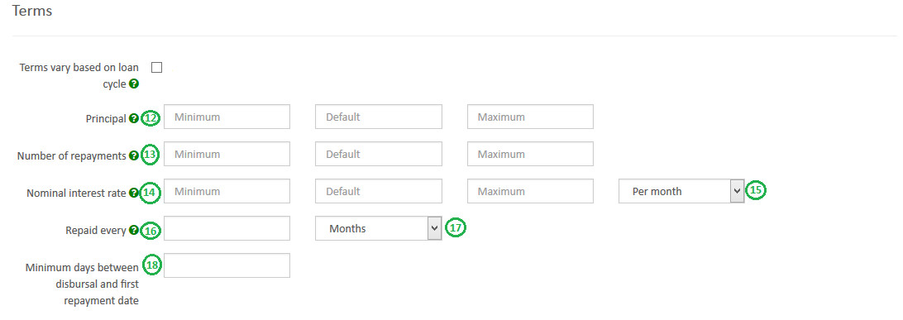
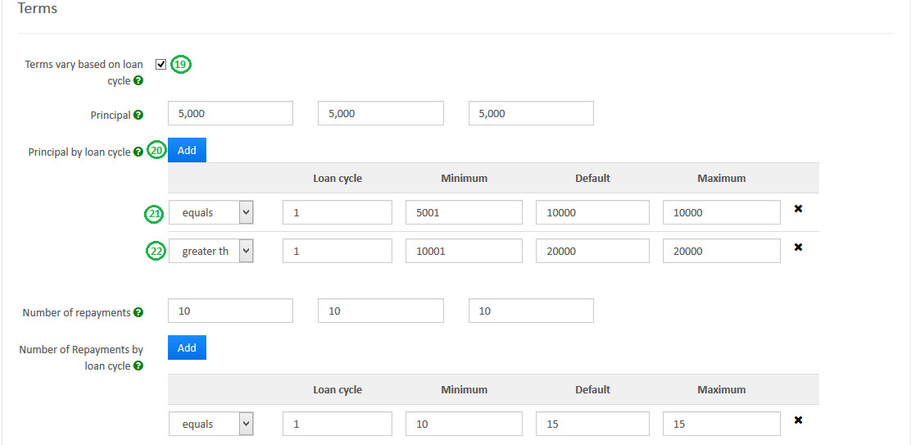
- 12 - Provide Principal(Loan) amount, Default field is a mandatory field. Minimum and Maximum are optional fields where in loan amount cant be provided beyond the min & max value.
- 13 - Provide Number of repayments, Default field is a mandatory field. Minimum and Maximum are optional fields where in no. of repayments cant be provided beyond the min & max value.
- 14 - Provide Rate of Interest, Default field is a mandatory field. Minimum and Maximum are optional fields where in rate of interest cant be provided beyond the min & max value.
- 15 - Select Per month or Per year for Rate of Interest.
- 16 - Provide Repaid Every value
- 17 - Select Day or Week or Bi-weekly or Month
Settings

- 24 - Select Amortization: Depending upon the type of amortization you practice select one.
- 25 - Select Interest method: Depending upon the type of interest method you practice select one.
- 26 - Select Repayment strategy: The repayment strategy determines the sequence in which each of the components is paid. For more information on Repayment strategies: Loan Product Fields - Repayment strategy.
- 27 - Select Interest calculation period:
- On Principle Payment is '6' and the client's Repayment Frequency is every month, then for the first six months, the client has to pay Interest only and after six months the client starts paying principle amount too.
- On Interest Payment is '6' and the client's Repayment Frequency is every month, then for the first six months, the client has to pay Principle only and after six months the client starts paying Interest amount too.
- 31 - Select Days in year: Depending upon your organizations financial days select respectively.
- 32 - Select Days in Months: Depending upon your organizations financial practice select respectively.
Interest Recalculation

fig 1.7: Interest Recalculation
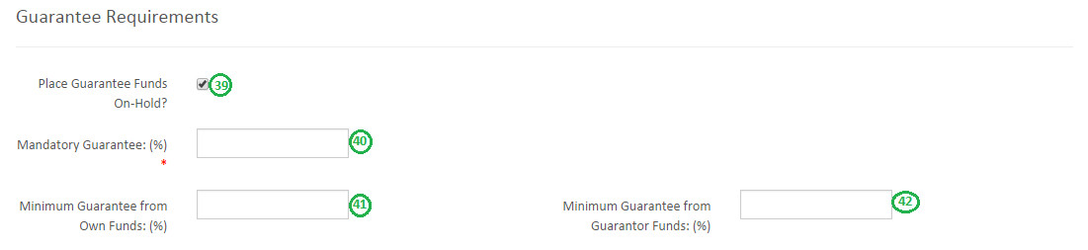
Guarantee Requirements
Loan Tranche Details

Configurable terms & settings

Charges

Overdue Charges

fig 1.12 Overdue Charges
Accounting

fig 1.13 Accounting
- Cash
- Accrual (periodic)
- Accrual (upfront)
>> Map accounts with respect to the loan product accounts. For information on these accounts refer: A Possible accounting Spec - Accounting rules for loans.
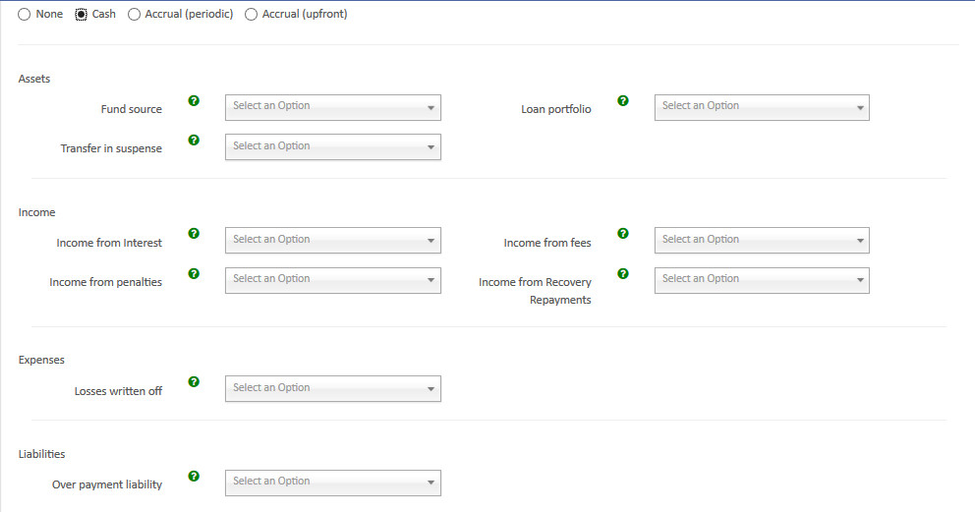
fig 1.14 Accounting
Advanced Accounting Rule
On clicking on the show button it enables Advanced accounting rule.
If you click on Add button, it will expand and shows up selection drop-downs.
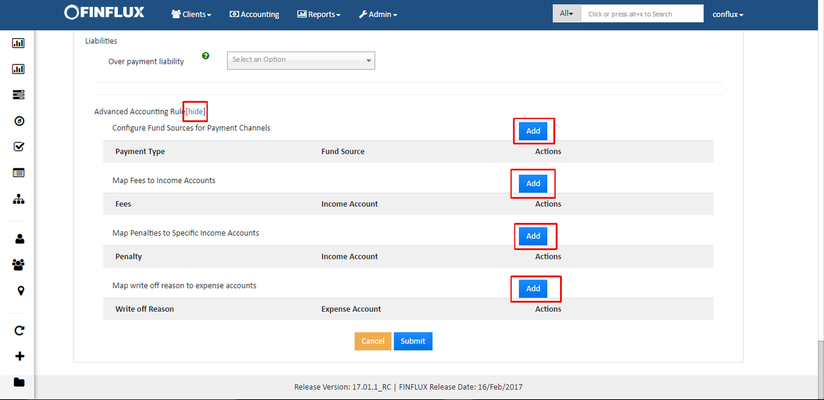
fig 1.15: Advanced Accounting
- Configure Fund sources for Payment Channels.
As shown in the fig 1.16 all the payment types defined in Admin>>Organization>>Payment Types will be populated under Payment Type drop down and as shown in the fig 1.17 all the active or enabled assets defined in Accounting>>Chart Of Accounting will be populated under Fund Source drop down. In the below example the payment type credit card is configured with Saving Reference fund source. Similarly Cash can be configured for Loan Portfolio Fund source.
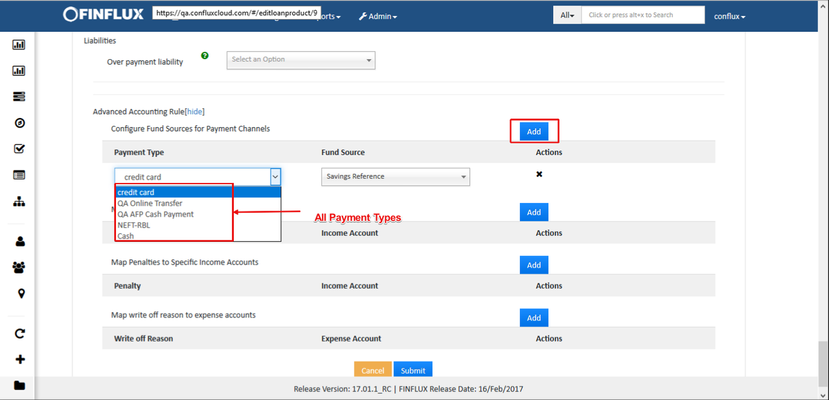
fig 1.16: Payment Type
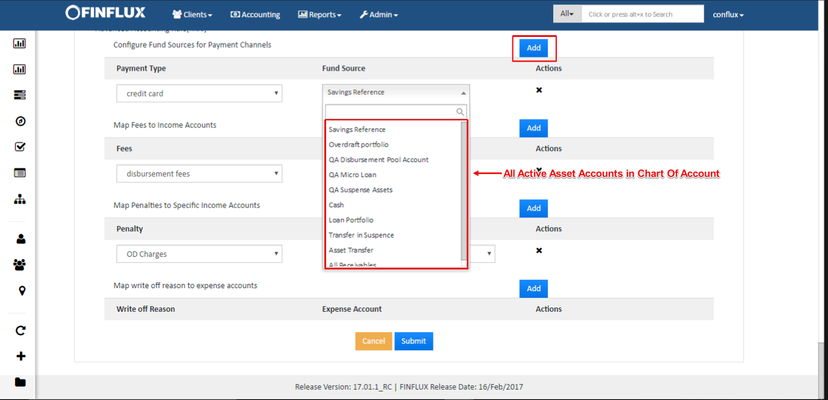
fig 1.17: Fund Source
- Map Fees to Income Accounts.
As shown in the fig 1.18 all the Fees defined in Admin>>Product>>Charges (except IsPenalty checked charges) will be populated under Fees drop down and as shown in the fig 1.19 all the enabled income defined in Accounting>>Chart Of Accounting will be populated under Income Account drop down. In the below example the Fees disbursement fees is mapped with Income from fees Income Account. Similarly QAProcessing Fee can be mapped for QA Processing Fee Income Account where the Journal entries happens with respect to the mapped Accounts.
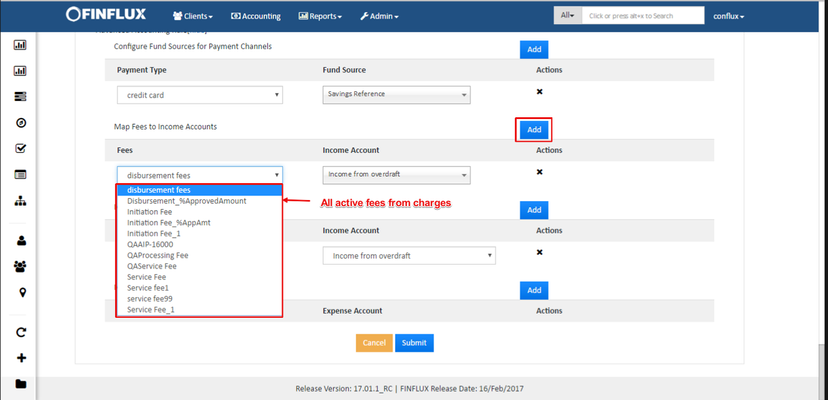
fig 1.18: Fees
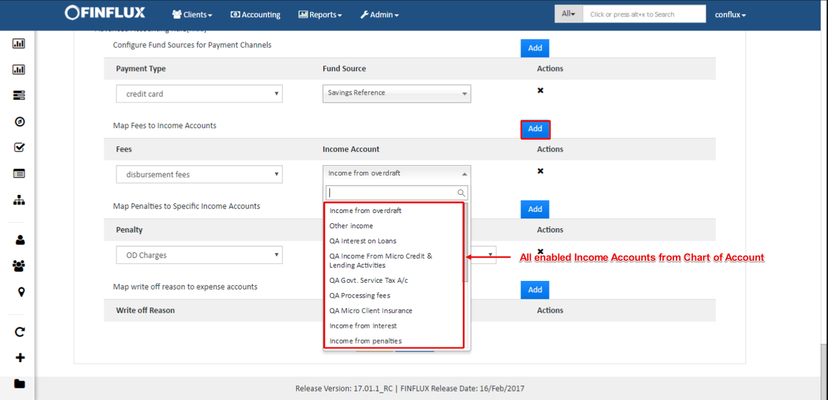
fig 1.19: Income Account (Fees)
- Map Penalties to Specific Income Accounts
As shown in the fig 1.20 all the Penalty defined in Admin>>Product>>Charges (only IsPenalty checked charges) will be populated under Penalty drop down and as shown in the fig 1.21 all the enabled income defined in Accounting>>Chart Of Accounting will be populated under Income Account drop down. In the below example the Penalty OD Charges is mapped with Income for Overdraft Income Account. Similarly Penalty can be mapped for Income from Penalties Income Account where the Journal entries happens with respect to the mapped Accounts.
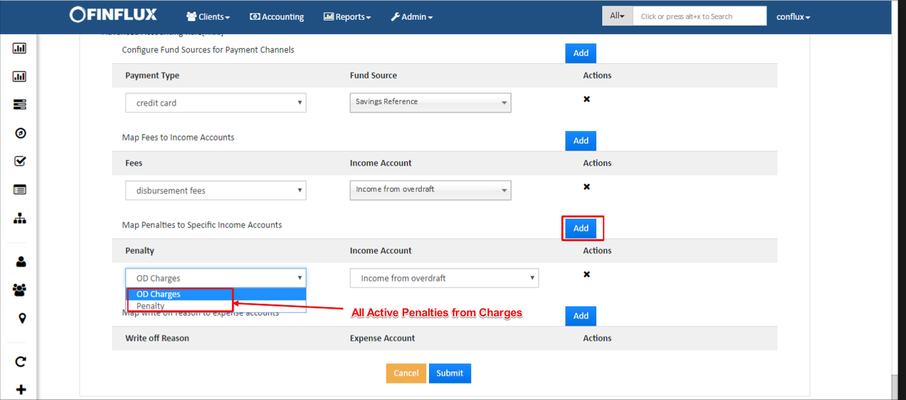
fig 1.20: Penalty

fig 1.21: Income Account (Penalties)
- Map Write off Reason to Specific Expense Accounts
As shown in the fig 1.22 all the Write Off Reason defined in Admin>>System>>Manage Code>>WriteOffReasons will be populated under Write Off Reason drop down and as shown in the fig 1.23 all the enabled expense defined in Accounting>>Chart Of Accounting will be populated under Expense Account drop down. In the below example the Write Off Reason Fake is mapped with Loss Expenses Expense Account. Similarly Death can be mapped for Expense Due to Death Expense Account where the Journal entries happens with respect to the mapped Accounts.
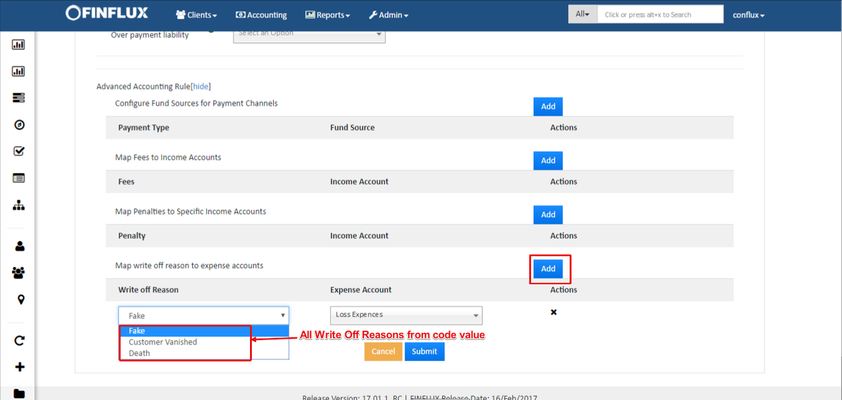
fig 1.22: Write Off Reason
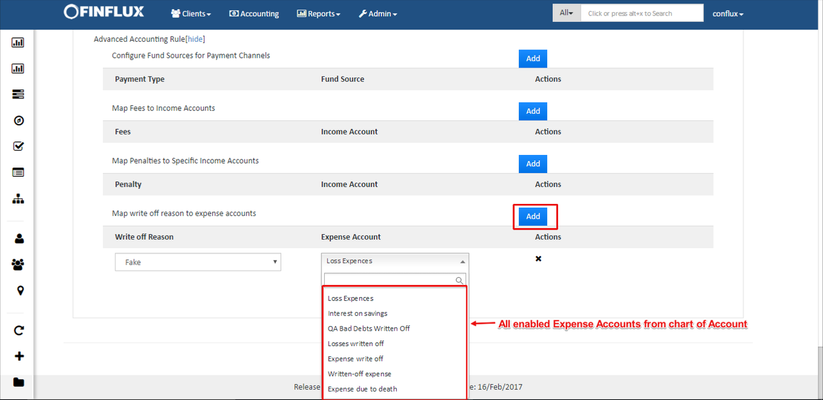
fig 1.23: Expense Account
Click on Submit button to Save/Create loan product.
![]()
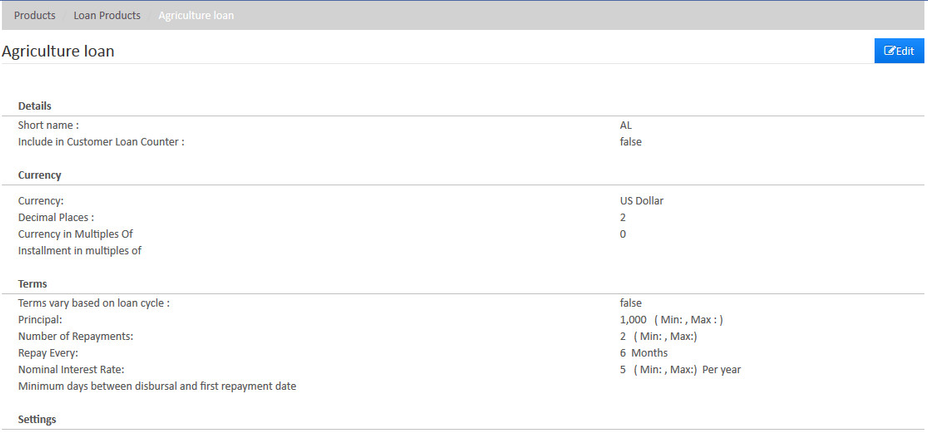
View Loan Product
Go to Admin>>Product>>Loan Products
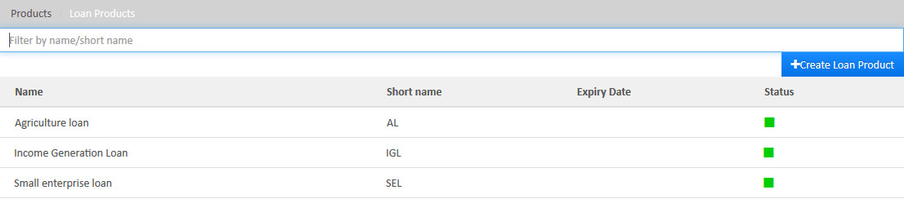
fig 1.24: View Loan Product
Edit Loan Product
Go to Admin>>Product>>Loan Products>>Select loan product (Ex: Agriculture loan) >> then click on Edit button.
Key Error Messages
A loan account is a specific instance of a loan product, with a specified interest rate and an account number, and it is owned by a financial institution client.
Related articles